
Hello everyone!
Lately I’ve been very busy with a lot of different things, like the garden, the day job and most of all a patio renovation! Oh my, things do take time!
On the sewing front I’m a bit behind now, and when I finally had the time to do something, non of my projects felt very appealing… So I decided to dip dye a boring beige jersey instead.
There’s nothing like procrastinating, right!
First I checked that I had enough of it for my planned project, and it was a close call. I had to plan some creative cutting, but after that I had a go!
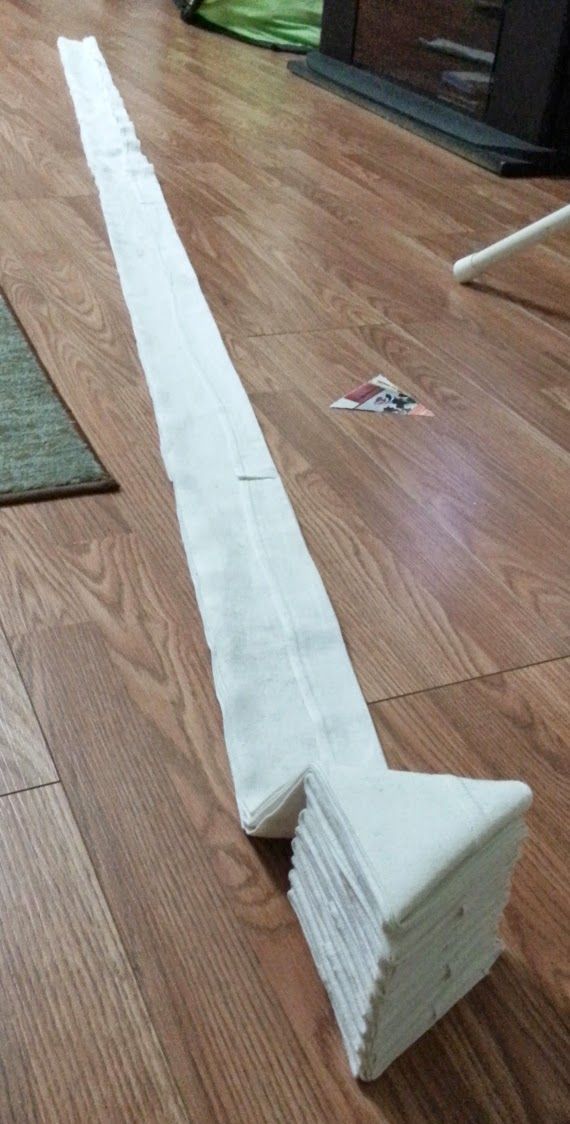
I wanted my new jersey batwing top to have horizontal stripes, so first I folded the fabric in accordion pleats ACROSS the body, maybe a hand wide. (It’s important to not fold it “around”, like rolling it into a tube, because you want all the sides of the pleats to have equal access to the dye)
When I had all the fabric in even folds in a long narrow pile, I did the same again, but in the opposite direction.
The technique is pretty hard to describe, but it’s easy to find information in places like Pinterest. It’s called plangi, but the similar shibori techniques from Japan are more easy to find. Here’s an image from Finnfactor.blogspot.nl showing how the folding forms a very thick fabric pile in the end. (Here it’s a triangle, I made a square.)
I learned this technique at a workshop when I went to design school, it was held by an African artist. It was EXTREMELY difficult to get the pleats right ( we did of course do them much smaller than in this little experiment) this is a piece that I did back then. To be able to handle these narrow pleats you have to work with the fabric wet, but it still isn’t easy!

So, when all the folding was done, I ended up with this little chubby brick of fabric. As you can see I secured it with string.
I used silk fabric paints to dye it.(They are not meant to be used that way, but it works ok.)

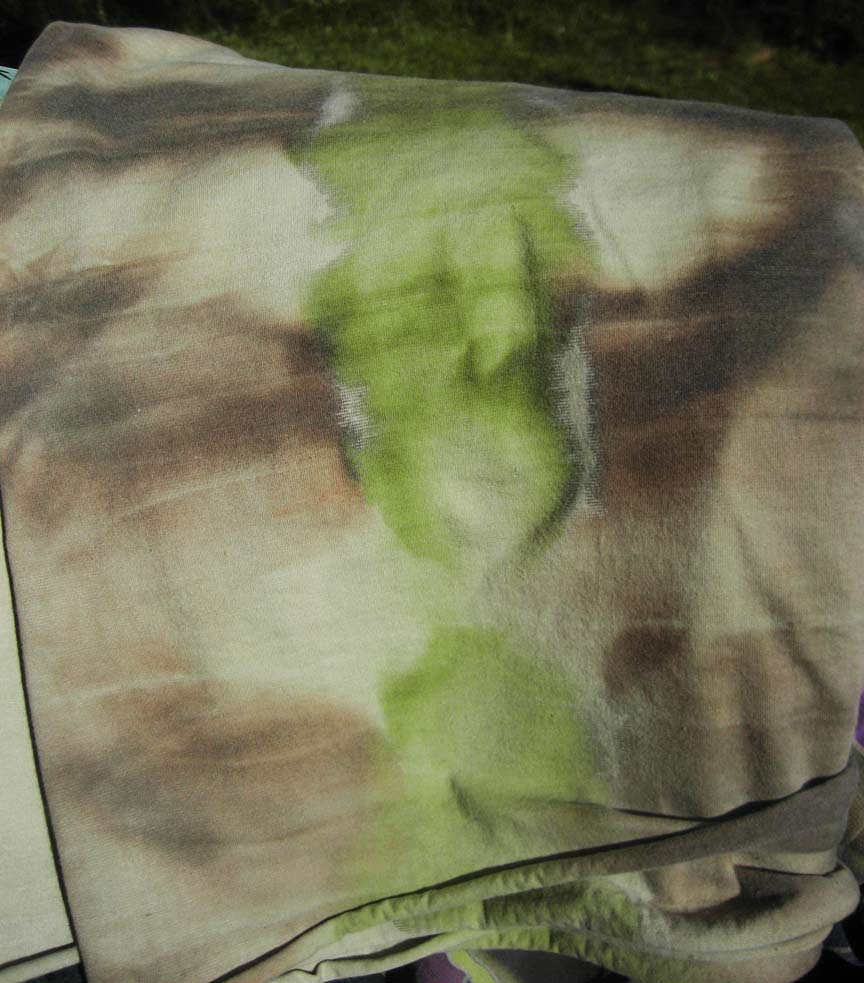
One end of my brick I dipped in a green color. It turned our VERY green, but this type of dye washes out of the fabric pretty much so I didn’t worry too much.
The other end went into a dark brown bath, and I kept it there for maybe 15 minutes.

After that I diluted the brown with a lot of water, and put the whole thing in. I wanted it to be striped, but not TOO stripey, if you know what I mean?
I untied it and took it outside to dry, and after that I ironed it really hot. This is needed with the colors I used, to fix the color to the fabric.

After that it went into the washing machine, and it came out a bit less green, but very much OK!

The piece I need to use for my “creative cutting” did also get a short while in the diluted dye bath, but it didn’t catch a lot of color, but that will be fine too.
This is the fabric before the washing machine:

And after:
All in all, a very nice result! Now I just need to sew that top….
